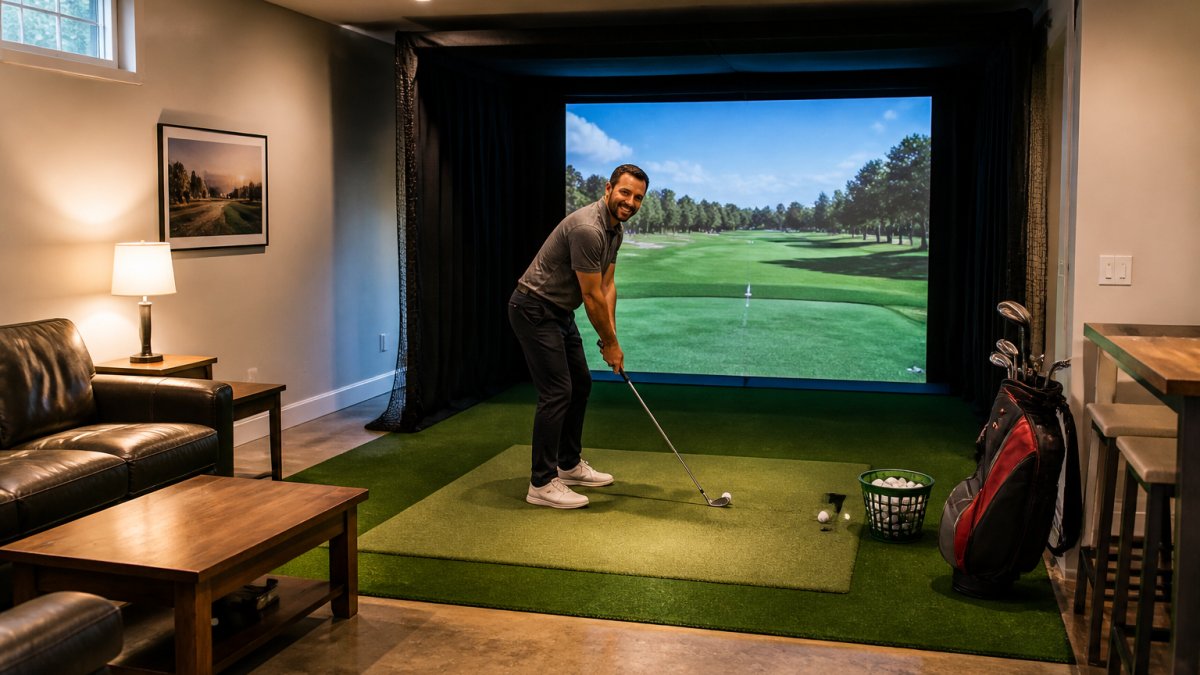
 how-to
How to Build a Basement Golf Simulator: 7-Step Guide
Table of Contents
- Step 1: Measure Your Basement Golf Simulator Dimensions Before You Buy Anything
- Step 2: Plan Your Golf Simulator Room Layout and Hitting Area
- Step 3: Choose a Golf Simulator Launch Monitor for a Basement Bay
- Step 4: Select an Impact Screen, Enclosure, and Hitting Mat
- Step 5: Handle Moisture, Concrete, Electrical, and Noise Before Framing
- Step 6: Frame the Enclosure, Run Cables, and Align the Projector
- Step 7: Budget Your DIY Golf Simulator Cost and Build in Stages
- Frequently Asked Questions
Last Updated: October 13, 2026
Step 1: Measure Your Basement Golf Simulator Dimensions Before You Buy Anything
The three numbers that decide whether a basement golf simulator will work are ceiling height, room width, and room depth.
A basement golf simulator is an indoor practice bay built around a launch monitor, impact screen, and hitting mat. Most builds fail at the measuring stage, not the buying stage.
Grab a tape measure and notepad. Note the lowest ceiling point, including ducts, beams, and light fixtures.
Ceiling Height, Width, and Depth: The Three Numbers That Decide Everything
Ceiling height kills most basement builds. A driver swing needs roughly 9 to 10 feet of clearance for an average-height golfer; taller players need more.
Width matters because the enclosure and swing zone both need room. Depth decides how far the ball travels before hitting the screen, which changes how the shot reads.
Here is what to check before you commit:
- Lowest ceiling point, not the average
- Width at the hitting line, not at the doorway
- Depth from tee to screen wall
Swing Clearance Testing for Right- and Left-Handed Golfers
Swing clearance is the space a club needs to pass through without hitting anything. Test it with a real club before buying.
Stand where you plan to hit. Take a slow backswing and follow-through with your longest club. If the clubhead touches a joist or wall, you need a shorter club or a different spot.
Right-handed golfers need clearance on the right for the backswing and the left for follow-through; left-handed golfers need the reverse.
Step 2: Plan Your Golf Simulator Room Layout and Hitting Area
A good golf simulator room layout centers the hitting area on the screen with equal clearance on both sides; storage, seating, and the computer fit around that core. A basement is rarely a dedicated room, it is a laundry area, storage zone, stair landing, and utility closet you are now asking to also hold a golf bay.
Start with the hitting line. Mark it on the floor with tape. Then work outward.
Set the Core Dimensions Before You Move Anything
A workable bay needs three distances to line up:
- Tee-to-screen depth: Most camera-based launch monitors read reliably from roughly 8 to 10 feet of ball flight, while radar units often want more room behind and in front of the ball. Confirm the number for your monitor before committing the tee location.
- Hitting-line width: Allow at least 3 to 4 feet of swing zone on each side of the ball for a full driver swing, and more for taller golfers or longer clubs.
- Screen width: Match the enclosure to the projected image, not the other way around. A 16:9 image on a 10-foot-wide screen leaves unused screen on the sides; a 4:3 image fills more of a squarer wall.
Mark the tee, screen wall, and projector throw distance on the floor with tape, and walk the path before drilling.
Plan Around Obstructions, Not Through Them
Map the basement's fixed obstacles first:
- Structural posts and lally columns: These often sit dead center in the room. Either shift the hitting line so the post is behind the tee, or build the enclosure around it and pad the post.
- Stairs and stairwells: Keep a clear walking path at least 36 inches wide to the stairs. Do not let the enclosure or mat block egress.
- Furnace, water heater, and electrical panels: These need code-required clearance and service access. Never frame a wall or hang a screen in front of a panel, and keep the manufacturer's clearance around combustion equipment.
Preserve the Room's Other Jobs
Most basements pull double duty. Plan for that now or you will fight the room forever.
- Walkways: Keep a clear path from the stairs to any storage, utility, or living space. A removable or roll-up mat helps when the bay shares space with a rec room.
- Storage: Use the wall behind the tee and the space under the screen for shelving, bag storage, and ball bins. Vertical storage keeps the floor clear.
- Seating and viewing: Put a small bench or chairs off to the side, outside the swing arc and outside the projector beam.
U.S. Department of Energy guidance on basement moisture and humidity control
Step 3: Choose a Golf Simulator Launch Monitor for a Basement Bay
A golf simulator launch monitor tracks ball flight and club data and sends it to your simulation software.
Radar units track the ball through space and need room behind and in front of the ball to read the full flight, a problem in a short basement.
Camera units sit close to the ball and read impact and initial flight, needing less depth, which suits tighter spaces.
Ask three questions before you buy:
- How much depth does the unit need behind the ball?
- Which simulation software does it work with?
- Does it read both ball flight and club data?
Compatibility is where people get burned: a monitor that does not talk to your chosen software is a paperweight.
Step 4: Select an Impact Screen, Enclosure, and Hitting Mat
Screen quality shows up two ways: how quiet it is on impact, and how well the image holds.
The enclosure frames the screen and catches stray balls. Look for a tight frame and padding on every hard edge.
For the hitting mat, thickness and turf quality matter more than brand.
- Screen: tight, quiet, and wrinkle-resistant
- Enclosure: padded frame, no exposed metal
- Mat: thick enough to protect wrists and elbows
Consumer Product Safety Commission guidance on home projectors and electrical safety
Step 5: Handle Moisture, Concrete, Electrical, and Noise Before Framing
Basement moisture control comes before framing. Concrete walls and floors wick water, and trapped damp rots framing and ruins screens. This step decides whether your bay still works in three years.
Test for Moisture Before You Build
Run two simple tests:
- Plastic sheet test: Tape a 12-by-12-inch square of clear plastic to the floor and to a wall for 24 hours. Condensation on the underside of the plastic means moisture is moving through the concrete. Condensation on top means the air is humid and you need a dehumidifier.
- Hygrometer check: A cheap hygrometer left in the room for a few days tells you the baseline relative humidity. Basements that sit above roughly 50 to 55 percent relative humidity are prone to mold, musty smells, and warped screen fabric.
If either test fails, fix the source before framing: grading and drainage outside, a sump pump, a dehumidifier sized to the room, or a sealed vapor barrier on walls and floor.
Protect Concrete and Finished Walls
Do not fasten framing directly against damp concrete. Leave a gap and use below-grade-rated materials.
- Furring and framing: Use pressure-treated or moisture-resistant lumber where it contacts concrete, and keep a capillary break between wood and slab.
- Insulation: Closed-cell rigid foam or extruded polystyrene works as both insulation and a vapor retarder against a basement wall. Avoid fiberglass batts pressed directly against damp concrete.
- Fasteners: Use concrete screws or powder-actuated fasteners rated for the substrate. Tapcon-style screws are the common choice for attaching furring to a slab or wall.
Electrical, Ventilation, and Code
Plan electrical and ventilation before the walls close up:
- Outlets: Add dedicated outlets where the computer, projector, monitor, and launch monitor will sit. A ceiling outlet near the projector saves a long cable run.
- Circuit capacity: A projector, gaming computer, monitor, and launch monitor can share a circuit, but check the total draw against the breaker. If you are adding a space heater or dehumidifier, give it its own circuit.
- Cable routing: Run power, HDMI, and network cable in conduit or behind the finished wall so you can replace a cable later without opening the wall.
Cut Noise and Vibration
Noise and vibration travel through framing and ductwork. If the bay sits under a bedroom, soundproof before the walls go up, far cheaper now than after.
- Decouple the frame: Isolate the enclosure frame from the ceiling joists with rubber pads or resilient channel so impact energy does not travel straight into the floor above.
- Insulate cavities: Mineral wool or acoustic batts in the wall and ceiling cavities absorb impact noise.
- Seal gaps: Caulk and acoustic sealant around outlets, ducts, and framing gaps stop sound from leaking through.
Step 6: Frame the Enclosure, Run Cables, and Align the Projector
Projector placement and image alignment come last, after the frame is up and cables are run.
Frame the enclosure first, keeping the screen tight and padding on every edge.
Run power, HDMI, and network cables before closing anything up.
Then place the projector with a clear line to the screen and no one walking through the beam.
Align the image with the projector's keystone and zoom until it fills the screen without spill.
- Frame and pad the enclosure
- Run all cables and test them
- Mount the projector out of the swing path
Step 7: Budget Your DIY Golf Simulator Cost and Build in Stages
DIY golf simulator cost depends on how much you build versus buy, and staging the build spreads the spend.
Most basements can be built in phases. Start with the measurements, prep, and frame.
Here is how we would stage it:
Stage | What You Do | Why It Comes Here |
|---|---|---|
1. Measure and prep | Check dimensions, moisture, electrical | Fix problems before framing |
2. Frame and screen | Build enclosure, hang screen, run cables | Core of the bay |
3. Mat and turf | Install hitting mat and flooring | Ready to hit |
4. Monitor and software | Add launch monitor and simulation | Bring the bay to life |
5. Projector and finish | Mount, align, and tune the image | Final polish |
Costs vary widely by room and equipment.
Federal Trade Commission guidance on home improvement and contractor contracts
Building a basement golf simulator is a measuring and prep job first, an equipment job second.
At My Golf Simulator, we have spent forty-six years helping golfers match equipment to their actual space.
Frequently Asked Questions
How tall does a basement ceiling need to be for a golf simulator?
Nine feet is the practical minimum for most golfers, and ten feet removes almost all doubt. The deciding factor is not your height but your swing: a steep, upright swing needs more headroom than a flat, shallow one. Measure from the floor to the lowest obstruction, which is usually a joist, duct, or light fixture, not the finished ceiling. Then have every golfer who will use the bay take a slow-motion swing under that spot before you buy anything.
How much space do you need to swing a golf club in a basement?
Plan on at least 10 feet of width and 12 feet of depth for the hitting area, plus another 7 to 10 feet behind the ball for radar-based launch monitors to read ball flight. A camera-based monitor can sit closer, which matters in a shallow basement. Ceiling height stays the hard limit at 9 feet minimum. If your room is narrower than 10 feet, a centered hitting position with the screen offset works better than trying to fit a full-width enclosure.
How do you protect basement walls and ceilings from errant golf shots?
Pad everything inside the enclosure perimeter, not just the screen. Use closed-cell foam or quilted panels on the side walls, the ceiling above the hitting zone, and any exposed concrete or finished drywall behind the screen. Add a weighted or tensioned screen that absorbs ball energy rather than bouncing it back. Also keep the launch monitor and computer outside the ball's likely miss zone. Errant shots travel fastest at impact, and the ceiling above a steep wedge shot takes more abuse than most people expect.
Which launch monitor works best in a basement with limited space?
Camera-based monitors generally suit basements better because they need only a few feet of ball travel, while radar units want 7 to 10 feet behind the ball to track flight. That said, radar still works if you have the depth. The real constraint is software compatibility: confirm the monitor supports the simulation software you want before you buy. Ask the seller to verify that pairing in writing, and confirm who handles it if the two do not talk to each other.