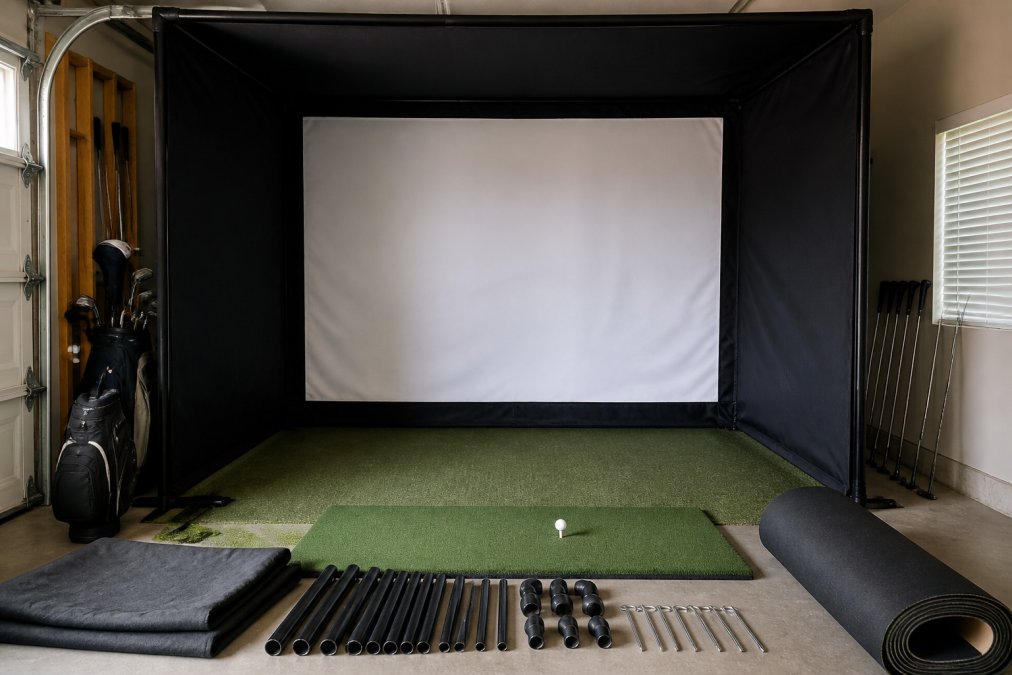
 listicle
Best Golf Simulator Enclosure for Home: 2026 Guide
Table of Contents
- What to Look For in a Golf Simulator Enclosure
- Minimum Room Dimensions for Golf Simulator Setups
- Golf Simulator Impact Screen Material Compared
- Frame Construction and Bungee Cord Systems
- DIY Golf Simulator Enclosure Ideas vs. Premium Kits
- Safety, Sound Dampening, and Bounce-Back Prevention
- Choosing the Right Enclosure for Your Home
- Final Thoughts on Your Home Golf Enclosure
- Frequently Asked Questions
Last Updated: September 7, 2026
The best golf simulator enclosure for home use is one that matches your specific room dimensions, swing speed, and budget, rather than the most expensive option on the market. A golf simulator enclosure is the frame and impact screen system that contains your shots safely indoors. At My Golf Simulator, we help homeowners avoid the two most common mistakes: buying an enclosure that is too small for their swing or overspending on features their space cannot support. Below, we'll walk through the technical specifications that actually matter, the trade-offs between DIY and premium kits, and how to ensure your setup delivers years of reliable performance.
What to Look For in a Golf Simulator Enclosure
Start with the three non-negotiables: ceiling height, screen size, and frame stability. Most residential setups fail because the buyer focuses on projection quality before confirming the physical space can handle a full swing. A proper enclosure does three jobs simultaneously: it stops the ball, protects your walls and ceiling, and provides a clean surface for projector images.
The frame must remain rigid when struck by a ball traveling at high speed. Look for aluminum or heavy-gauge steel extrusions with corner brackets that bolt together rather than snap. The screen tension system matters just as much, as a loose screen wrinkles and distorts your projection. Consider how the enclosure integrates with your lighting, since ambient light washing across the screen will ruin image clarity regardless of projector quality.
Minimum Room Dimensions for Golf Simulator Setups
The minimum room dimensions for golf simulator setups depend primarily on your height and swing path. For most golfers, you need at least 8 feet of width, 8 feet of depth, and 9 feet of ceiling height to swing a driver comfortably. Shorter irons require less space, but planning for the driver ensures you never feel restricted.
Space planning is the foundation of any successful DIY golf simulator enclosure idea. Measure from the floor to the lowest obstruction, such as a ceiling fan or light fixture, not just the finished ceiling. Account for your stance distance from the screen, typically 8 to 10 feet, to give the ball room to launch and the projector adequate throw distance. A common approach is to build the frame first in the room to visualize the footprint before committing to a full install.
Golf Simulator Impact Screen Material Compared
Golf simulator impact screen material determines both safety and image quality. The best screens use a dense, multi-layer polyester weave that absorbs ball energy without excessive bounce-back. Thinner materials may save money but often allow balls to pass through or develop holes after repeated impacts.
Consider the trade-off between visual clarity and durability. A screen with tighter weave density produces sharper images but can feel stiffer and louder on impact. Most quality screens sit around 10 to 12 ounces per square yard, balancing impact resistance with wrinkle-resistant tension. Look for blackout backing on the screen edges to prevent light bleed and improve contrast in a residential setup.
Frame Construction and Bungee Cord Systems
The frame and its tensioning system are the structural backbone of your enclosure, and understanding the mechanics is key to a successful installation. The two dominant frame designs are the corner-connector system and the continuous-cable system.
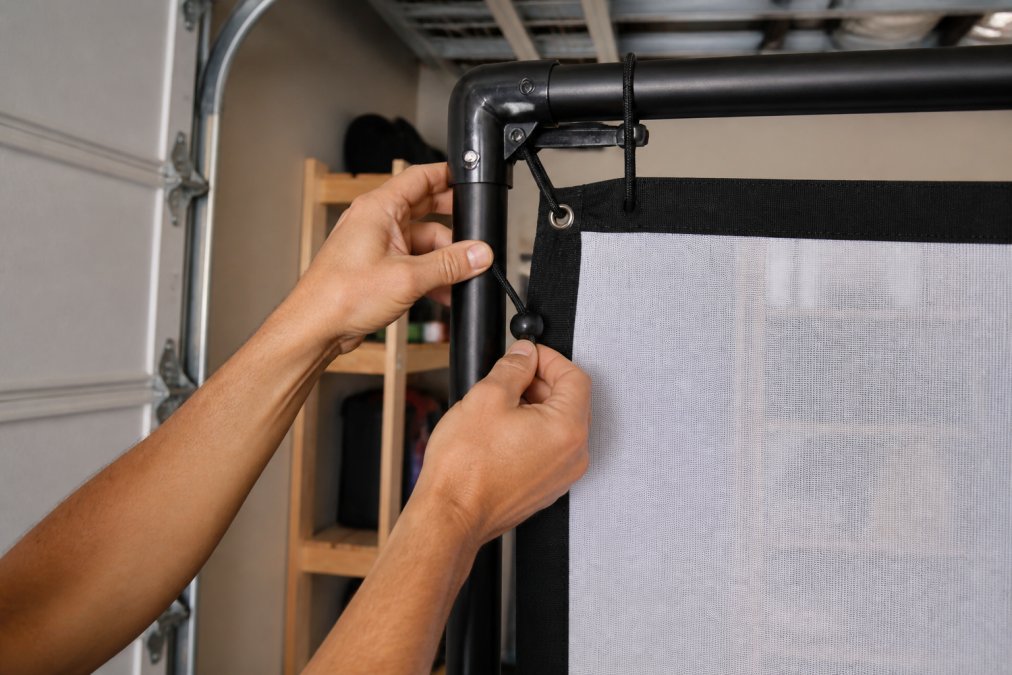
Corner-Connector Systems: This is the most common design in residential kits. It uses extruded aluminum rails that join at 90-degree corners with heavy-duty plastic or metal brackets. The screen is attached directly to the frame using bungee cords that hook into pre-drilled holes or slots on the extrusion. This system is straightforward to assemble and allows for easy screen replacement. However, the tension is applied at discrete points, which can lead to slight wrinkling between the attachment points if not adjusted carefully. When evaluating this system, look for brackets that use a cam-lock or set-screw mechanism rather than simple friction-fit pins, as the latter can loosen over time with repeated impacts.
Continuous-Cable Systems: This is the professional standard, often found in commercial simulators and high-end home kits. Instead of attaching the screen to the frame, a steel cable is routed around the perimeter of the frame, through a series of pulleys or corner blocks. The screen is then attached to this cable using a continuous sleeve or a series of bungee cords. The primary advantage is that tension is distributed evenly across the entire screen surface, creating a drum-tight projection surface that is free of wrinkles. The installation is more complex, requiring you to tension the cable using a turnbuckle or ratchet mechanism, but the result is a superior image quality and a more consistent rebound. A continuous-cable system can be worth the extra setup time if you are a perfectionist about image clarity.
Bungee Cord Selection and Maintenance: The bungee cords themselves are a wear item. Standard black bungee cords, often 3/16-inch or 1/4-inch in diameter, are the most common. However, they lose elasticity over time, especially in environments with temperature fluctuations. Cords can stretch out and cause the screen to sag over time with heavy use. When this happens, you do not need to replace the entire screen; simply replace the bungee cords. When purchasing replacements, look for UV-stabilized cords, which resist degradation from any ambient light or projector heat. Also, consider the hook type: some kits use a simple S-hook, while others use a ball-and-socket design that is less likely to scratch the frame. A useful upgrade is to use quick-release tensioners (often called 'bungee cinches') that allow you to fine-tune tension without unhooking the entire cord.
Frame Material and Gauge: While aluminum is the standard, the gauge of the extrusion matters. Look for frames constructed from 1.5-inch or 2-inch square or rectangular tubing with a wall thickness of at least 1/8-inch. Thinner, lighter extrusions (often found in budget kits) can flex or twist when struck by a high-speed ball, transferring energy to the screen and causing it to ripple. For a permanent installation, bolted corner connections are superior to snap-together plastic joints. A bolted joint provides a rigid, rattle-free connection that will not degrade over time.
DIY Golf Simulator Enclosure Ideas vs. Premium Kits
DIY golf simulator enclosure ideas appeal to handy homeowners, but the learning curve is steeper than most expect. Building your own frame from lumber or PVC is possible, yet achieving the flat, tensioned screen surface required for high-definition projection demands precision. A common DIY approach uses heavy-duty fabric or netting as side barriers, which works for containment but sacrifices visual quality.
Premium kits simplify the process with pre-cut aluminum extrusions, matching bungee cords, and engineered impact screens. The trade-off is cost, but you gain predictable assembly and a manufacturer-backed durability guarantee. Consider the installation tools required, since some kits need specialized wrenches or drills while others assemble with basic hand tools. For a residential setup you plan to use daily, the reliability of a purpose-built kit often justifies the higher price.
Option | Assembly Time | Durability | Image Quality | Best For |
|---|---|---|---|---|
Full DIY build | 2-3 weekends | Variable | Lower | Budget-focused tinkerers |
DIY frame + kit screen | 1 weekend | Good | Good | Hands-on homeowners |
Premium enclosure kit | 4-6 hours | Excellent | Excellent | Daily users wanting reliability |
Safety, Sound Dampening, and Bounce-Back Prevention
While most guides mention safety and sound in passing, few address the measurable performance of these systems. Here, we go beyond the basics to cover acoustic data and long-term maintenance, areas that are critical for a residential setup but often ignored.
Understanding Bounce-Back Mechanics: The goal is not to stop the ball dead, but to control its rebound. A high-quality screen absorbs the ball's kinetic energy by flexing. The screen material's weave density and the tension of the bungee system determine how much energy is absorbed. A screen that is too taut will cause a fast, hard rebound, while a screen that is too loose will sag and create a poor image. The ideal setup allows the screen to deflect 2-4 inches on impact, which reduces the ball's exit velocity to a slow, harmless drop. To test your setup, hit a few wedge shots and observe the rebound. If the ball bounces back aggressively, loosen the bungee tension slightly. If the screen ripples excessively, increase the tension.
Acoustic Performance: A Data-Driven Look: The sharp 'crack' of a driver shot can be a nuisance in a home. The sound you hear is a combination of the ball strike and the screen's vibration. While specific decibel ratings are not standardized across manufacturers, you can make informed choices based on material properties. A single-layer polyester screen will produce a sharper, higher-pitched sound. A multi-layer screen with a foam or felt backing will produce a duller 'thud' and reduce overall noise levels. In practice, adding a 1-inch acoustic foam panel behind the screen can reduce the transmitted sound by up to 5-10 decibels, which is a perceptible difference. For a more comprehensive solution, consider the room itself. Adding mass-loaded vinyl (MLV) to the walls behind the enclosure and using acoustic panels on the ceiling will dampen reverberation. A common pattern is to measure the room's noise level with a smartphone app before and after adding acoustic treatments; most users report a noticeable reduction in echo and a more pleasant sound profile.
Maintenance for Longevity: Your enclosure's safety features require regular upkeep. The bungee cords are the first point of failure. Inspect them monthly for signs of cracking, stretching, or loss of elasticity. Replace them in sets, not individually, to ensure even tension. The impact screen itself should be cleaned periodically. Dust and dirt can accumulate in the weave, affecting image brightness. Use a soft brush attachment on a vacuum cleaner to gently remove dust. For deeper cleaning, use a microfiber cloth slightly dampened with water and a mild soap solution. Never use harsh chemicals or abrasive cleaners, as they can damage the screen's reflective coating. Check the frame's corner joints and bolts for tightness every few months. A loose joint can cause the frame to flex and transfer energy unevenly, leading to premature screen wear.
Choosing the Right Enclosure for Your Home
Choosing the right enclosure for your home comes down to honest assessment of your space and usage patterns. Measure twice, account for your swing speed, and decide whether you will use the space for golf only or dual purposes. A permanent frame offers the best stability, while a modular design allows you to break down the setup when the room serves other functions.
The right golf simulator enclosure for home use should feel like a permanent fixture, not a compromise. Consider how the enclosure integrates with your projector mounting and launch monitor placement before finalizing the frame position. My Golf Simulator provides personalized guidance on enclosure kits, ensuring your bay is tailored to your space and budget rather than pushing the most expensive hardware. We help you match your screen size and frame to your specific ceiling height and playing goals, with honest advice that discourages overspending or under-building.
Final Thoughts on Your Home Golf Enclosure
A quality enclosure transforms any spare room or garage into a year-round practice facility, but the purchase requires careful planning. The best golf simulator enclosure for home use balances impact resistance, frame stability, and screen clarity against your available space and how often you play. Focus on the fundamentals, ceiling height, screen material, and frame construction, and you will avoid the disappointment of a poorly performing setup.
For golfers serious about building a premium indoor space, the difference between a frustrating setup and a flawless one comes down to expert guidance. At My Golf Simulator, our 46 years of customer service experience means we focus on building lasting relationships rather than just making a sale. We offer post-installation support long after your enclosure is mounted, so you are never left troubleshooting on your own. Book a consult with My Golf Simulator and get an enclosure that fits your room, your swing, and your game.
Frequently Asked Questions
What is the difference between a DIY enclosure and a premium kit?
DIY enclosures typically involve building a frame from raw materials like PVC or aluminum and attaching an impact screen yourself. Premium kits include pre-cut, powder-coated metal frames, custom-sized screens, and complete bungee systems designed for a specific space. Kits often provide better screen tension, easier assembly, and a more finished look. DIY can save money but requires more planning, tools, and time to achieve a similar result, especially for a permanent residential setup.
Do I need a high-impact screen for my golf simulator enclosure?
Yes. A high-impact screen is the core of any golf simulator enclosure. Standard projector screens or thin fabrics will not withstand repeated ball strikes and will tear or allow dangerous pass-through. Look for a screen with a high material density, typically made from layered polyester or vinyl, designed specifically to absorb ball speed. A quality impact screen also improves visual clarity and provides the acoustic dampening needed to reduce noise in your home.
How much room do you need for a golf simulator in your house?
For a functional setup, you need a minimum room dimensions for golf simulator of about 10 feet wide, 10 feet tall, and 15 feet deep. The width allows for side barriers and a safe swing area. Ceiling height of at least 9 feet is critical for most golfers to swing a driver freely. The depth is needed for the hitting bay, projector throw distance, and space behind the ball for your stance and backswing.
What material is best for a golf simulator enclosure?
The best golf simulator impact screen material is a heavy-duty, multi-layer woven polyester. This material offers the right balance of impact resistance, durability, and high-definition projection quality. It should be stretchable enough to absorb ball speed without tearing but taught enough to prevent excessive bounce-back. The surrounding enclosure fabric should be a light-blocking, blackout material to prevent projector light from bleeding through and to improve the contrast of the projected image.