 how-to
Golf Simulator Software Setup for Beginners: 2026 Guide
Table of Contents
- What You Need Before Starting Golf Simulator Software Setup
- Step 1: Choose the Best Golf Simulator Software for Home Use
- Step 2: Meet the Golf Simulator PC Requirements
- Step 3: Connect Your Launch Monitor to the Software
- Step 4: How to Calibrate Golf Simulator Software
- Step 5: Optimize Your Space for Better Accuracy and Safety
- Common Setup Mistakes and How to Avoid Them
- Conclusion: Get Your Simulator Running With Confidence
- Frequently Asked Questions
Last Updated: September 9, 2026
Getting a golf simulator running for the first time can feel like assembling a puzzle. This guide from My Golf Simulator walks through the core steps of golf simulator software setup for beginners, from choosing the right platform to calibrating your sensors for accurate ball data.
Your software is the brain of the operation, translating raw launch monitor data into a virtual round. Golf simulator software setup is the process of installing, connecting, and calibrating your platform to work with your hardware and room.
What You Need Before Starting Golf Simulator Software Setup
Before you download anything, confirm that your physical space and computer can handle the load.
First, measure your space. You need a minimum ceiling height of 9 feet for a full swing with a standard driver, though 10 feet is more comfortable for taller players. The depth must accommodate your hitting zone, the launch monitor’s required ball-to-unit distance, and the space between you and the impact screen.
Second, check your computer specifications. Simulation software is graphically intensive; you will need a dedicated graphics card. Check the specific "golf simulator PC requirements" for the software you choose, as they vary between basic driving range apps and full 4K course simulations.
Step 1: Choose the Best Golf Simulator Software for Home Use
The best golf simulator software for home use depends on your priorities: photorealistic course play or detailed swing analysis.
There are three general categories. Subscription-based platforms offer a library of courses via an annual fee. Perpetual license options are a one-time purchase for a specific set of courses. Free or basic versions often come bundled with a launch monitor, providing a stripped-down driving range to test your hardware before you commit to a paid plan.
Step 2: Meet the Golf Simulator PC Requirements
Once you have selected your software, verify your PC specs against the recommended requirements, not just the minimum. The other half is configuring Windows and your GPU so the software can actually use that hardware.
Baseline Hardware That Actually Matters
For a baseline, you will want a modern multi-core processor and at least 16GB of RAM (pcmag.com). The graphics card is critical; look for one that supports your projector's resolution and aspect ratio.
Component | Minimum Spec | Recommended Spec |
|---|---|---|
Processor (CPU) | Quad-core 3.0 GHz | Six-core or higher |
Memory (RAM) | 16 GB | 32 GB |
Graphics Card (GPU) | 4GB VRAM | 8GB+ VRAM for 4K |
Storage | SSD (Solid State Drive) | NVMe SSD for faster loading |
The Optimization Step Most Guides Skip
The real performance gains come from what you do after you install the software. Here is the sequence we recommend to every beginner who complains about stuttering or delayed ball flight:
- Update your GPU drivers first. Go directly to NVIDIA's or AMD's website, not Windows Update. Running an outdated driver is the single most common cause of graphical glitches or crashes.
- Set the power plan to High Performance. By default, Windows balances power to save energy, throttling your CPU and GPU. Open Control Panel > Hardware and Sound > Power Options and select "High Performance." If you are on a laptop, ensure it is plugged in during play.
- Disable fullscreen optimizations. Right-click the simulator's executable file, go to Properties > Compatibility, and check "Disable fullscreen optimizations." This feature can introduce input lag and frame pacing issues.
- Add an exception in Windows Defender. Real-time virus scanning can interrupt the software mid-swing, causing a micro-stutter at impact. Add your simulator's installation folder and your launch monitor's app folder to the exclusions list.
- Turn off game overlays. If you have Discord, GeForce Experience, or Xbox Game Bar running, disable their overlays. They compete with the simulator for GPU resources.
Why Frame Rate Matters for Accuracy
If the frame rate drops below your projector's refresh rate, the software may skip frames, making the ball appear to teleport or lag behind your swing. This corrupts your ability to make swing adjustments. A stable 60 frames per second is the practical target for most home setups (nvidia.com).
The Hidden Cost of 4K
If you are planning a 4K projector, understand that you are asking your GPU to render four times the pixels of 1080p. A more practical approach is to run the simulator at 1080p or 1440p and let the projector upscale. The visual difference is minimal at typical simulator distances, but the performance difference is massive. If you insist on native 4K, budget for a GPU with at least 8GB of VRAM (intel.com).
Storage Speed Affects Loading, Not Just Boot Times
Your storage drive affects how fast courses load and how quickly textures stream in during play. An NVMe SSD is strongly recommended over a SATA SSD or a hard drive. If you are on a hard drive, the software may pause to load textures mid-swing. Move your simulator installation to an SSD if you have one available.
After you have confirmed your PC is performing correctly, the next step is connecting your launch monitor to the software.
Step 3: Connect Your Launch Monitor to the Software
Connecting your launch monitor is usually a matter of establishing a local network connection between the device and your PC. Most modern monitors use Wi-Fi or Bluetooth, but a wired Ethernet connection is often more stable for preventing latency.
Start by installing the launch monitor's native app to update the firmware. Then, open your simulation software and navigate to the "Device Settings" or "Sensor" menu. The software should auto-detect the monitor. If it doesn't, check that both devices are on the same network frequency.
Step 4: How to Calibrate Golf Simulator Software
Calibration aligns the virtual camera view with your physical hitting area. If this is off, your shots will fly consistently left or right, regardless of your swing path.
To calibrate, place the ball on your hitting mat at the exact mark where you will always hit from. In the software, navigate to the alignment settings and aim the virtual camera down the center of your intended target line. Use a laser level or a straight edge to ensure your stance is square to the impact screen.
Most software also requires you to set the "sensor height" or "unit height" relative to the floor. This is crucial for accurate carry distance readings. After setting the height, hit a few calibration shots with a known club, like a pitching wedge, to verify the side spin and carry distance.
Step 5: Optimize Your Space for Better Accuracy and Safety
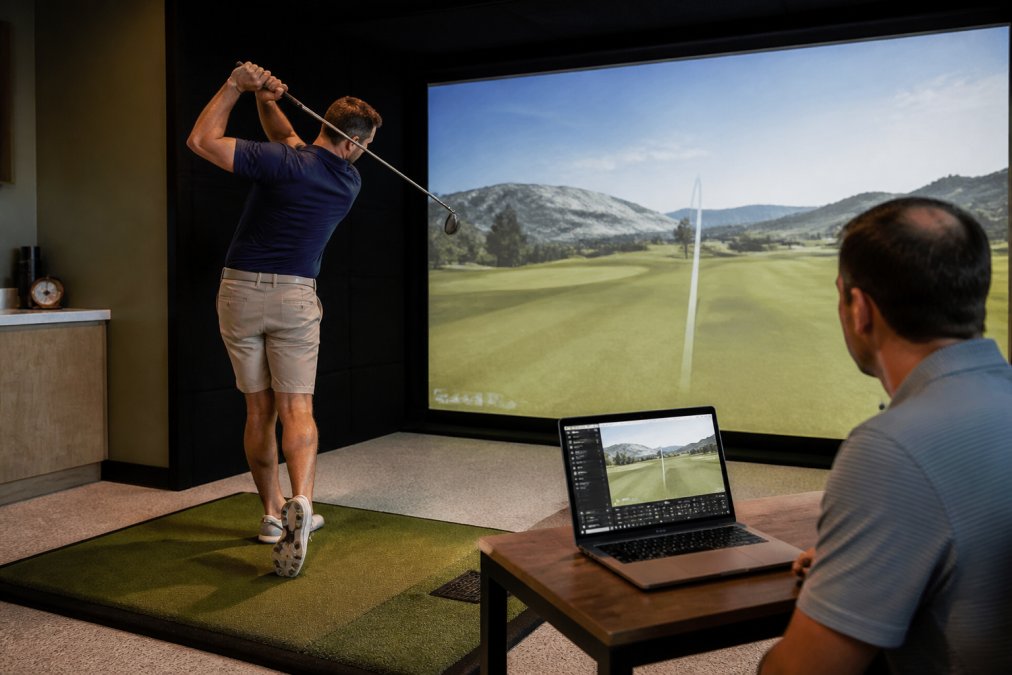
Your physical environment directly impacts software accuracy. The launch monitor needs a clear, unobstructed view of the ball and the clubhead. Remove any objects between the monitor and the hitting zone that could interfere with the radar signal or camera optics.
Acoustics also play a role. In a room with hard floors and bare walls, the impact sound can be deafening. Adding a rug under the hitting area and acoustic panels on the walls near the impact zone reduces noise. Ensure your hitting mat is thick enough to absorb shock; a thin mat can cause joint pain and lead to a flinch in your swing.
Common Setup Mistakes and How to Avoid Them
Many beginners rush the initial setup and then spend weeks troubleshooting issues that are simple to avoid. The most frequent error is ignoring the projector's throw distance. You must install the projector so that the image fills the impact screen without creating a shadow when you stand at the ball.
Another significant mistake is neglecting the software's aspect ratio settings. If the image appears stretched or cropped, the virtual distances will look wrong. Set your projector and software to the same native aspect ratio, typically 16:9.
Finally, do not skip the "virtual rounds" test. Before you invite friends over, play a full hole to test the sensor alignment and latency. If the ball lags behind your swing, lower the graphics quality settings.
The Post-Setup Troubleshooting Guide Most Guides Omit
Once you have everything installed and calibrated, here are the most common issues that surface in the first week of ownership and how to resolve them.
Issue 1: The software randomly disconnects from the launch monitor mid-round.
This is almost always a network stability problem. If you are using Wi-Fi, move your router closer to the launch monitor or use a wired Ethernet connection. Ensure both devices are on the same band (2.4GHz or 5GHz). Also, check for interference from other devices, such as a microwave or cordless phone.
Issue 2: The ball reads as spinning sideways even though you hit it straight.
This is a calibration issue, not a hardware failure. Re-check the sensor height setting in the software. If the launch monitor is positioned too high or too low relative to the ball, it will misread the spin axis. Also, confirm that the hitting mat is perfectly level.
Issue 3: The image on the impact screen is blurry or out of focus.
This is usually a projector issue, not a software issue. Most projectors have a manual focus ring. Adjust it while the software is displaying a static image. If the image is sharp in the center but blurry at the edges, the projector may be positioned at an angle causing keystone distortion. Move the projector so it is perpendicular to the screen, or use keystone correction.
Issue 4: The software crashes when you try to load a specific course.
This is often a corrupted file or a memory issue. First, verify the integrity of the game files through the software's launcher. If that does not work, close all other applications to free up RAM. If the crash persists, the course may be incompatible with your GPU driver version.
Issue 5: The ball flight looks correct, but the carry distance is consistently shorter than real life.
This is a common complaint with a simple fix. Check the altitude and temperature settings in the software, as simulators use these values to calculate air density. If the software is set to sea level and 70 degrees Fahrenheit, but you are playing in Denver at 5,000 feet, the ball will fly shorter in the simulation. Set these values to match your actual location.
The Safety and Ergonomics Angle
Beyond technical troubleshooting, consider the physical setup. A common mistake is placing the hitting mat directly on a concrete floor without padding underneath, as concrete does not absorb shock and repeated swings can lead to joint pain. Use a rubber interlocking floor tile under the mat. Ensure the area behind you is clear of obstacles, and check that the impact screen is properly tensioned.
If you are stuck on compatibility or worried about your ceiling height, you don't have to guess. My Golf Simulator offers honest, consultative advice backed by forty-six years of customer service experience, helping you match your launch monitor and software to your specific room dimensions without overspending. We provide ongoing support long after installation so you are never left troubleshooting alone.
Book a consult today, and let us help you get from a box of parts to a perfectly tuned indoor golf experience.
Conclusion: Get Your Simulator Running With Confidence
Setting up your simulator software doesn't have to be a battle against the manual. By checking your PC specs, calibrating your sensors, and optimizing your room's acoustics and lighting, you can avoid the most common frustrations that plague new owners.
If you are stuck on compatibility or worried about your ceiling height, you don't have to guess. My Golf Simulator offers honest, consultative advice backed by forty-six years of customer service experience, helping you match your launch monitor and software to your specific room dimensions without overspending. We provide ongoing support long after installation so you are never left troubleshooting alone.
Book a consult today, and let us help you get from a box of parts to a perfectly tuned indoor golf experience.
Frequently Asked Questions
What is the best golf simulator software for home use?
The right software depends on your goals, budget, and launch monitor. If you want to play famous courses, look for titles with large course libraries. If practice and data matter more, choose software with detailed ball and club data dashboards. Most options offer free trials, so test a few before committing. Check that your launch monitor is compatible with the software you prefer before you buy.
What computer do I need to run a golf simulator?
Golf simulator software relies heavily on the graphics card. Look for a dedicated GPU with at least 6GB of VRAM, a modern quad-core processor, and 16GB of RAM. Games with detailed course graphics require more power than basic practice ranges. Check the specific requirements for the software you choose, and buy a PC that exceeds the recommended specs to keep your frame rate smooth.
Is golf simulator software subscription-based or a one-time purchase?
Both models exist. Some software packages are a one-time purchase, while others use an annual subscription that includes updates and new courses. A few offer a free basic version with premium features as a paid add-on. Consider how often you want new content. A subscription can spread the cost but adds up over time, while a one-time purchase may feel more expensive upfront.
How do I connect my launch monitor to simulator software?
Most launch monitors connect to your PC wirelessly or with a USB cable. Start by installing the software on your computer, then pair the device through the software's connection menu. Follow the on-screen prompts to complete the pairing. If you have trouble, check for firmware updates for both the launch monitor and the software, as outdated versions are a common cause of connection failures.