 how-to
Golf Simulator Enclosure Kit Buying Tips for 2026
Table of Contents
- Start With Your Room, Not the Kit
- Golf Simulator Enclosure Kit Buying Tips: Frame and Screen Specs
- The Best Golf Simulator Impact Screen Material for Your Bay
- DIY Golf Simulator Enclosure vs Kit: Which Fits Your Build?
- Match the Enclosure to Your Launch Monitor
- Safety, Electrical, and Long-Term Maintenance
- Common Mistakes in Enclosure Kit Buying
- Conclusion
- Frequently Asked Questions
Last Updated: September 16, 2026
Start With Your Room, Not the Kit
Most buyers shop for a golf simulator enclosure kit before measuring anything. That's backwards, the room decides the kit, not the other way around.
Measuring Width, Depth, and Ceiling Height
Width, depth, and ceiling height determine whether a kit fits, and ceiling height kills the most projects. A full driver swing needs roughly 10 feet of clearance for most adults; a 9-foot ceiling works for irons and hybrids but forces swing changes with the driver. Measure floor to lowest obstruction, light fixtures, garage door tracks, and HVAC ducts all count.
Golf Simulator Enclosure Kit Buying Tips: Frame and Screen Specs
Frame and screen specs separate a kit that lasts a decade from one that sags in a season. The frame carries the load, the screen absorbs energy, and the tensioning system holds both together. Get any wrong and the bay underperforms no matter how good the launch monitor is.
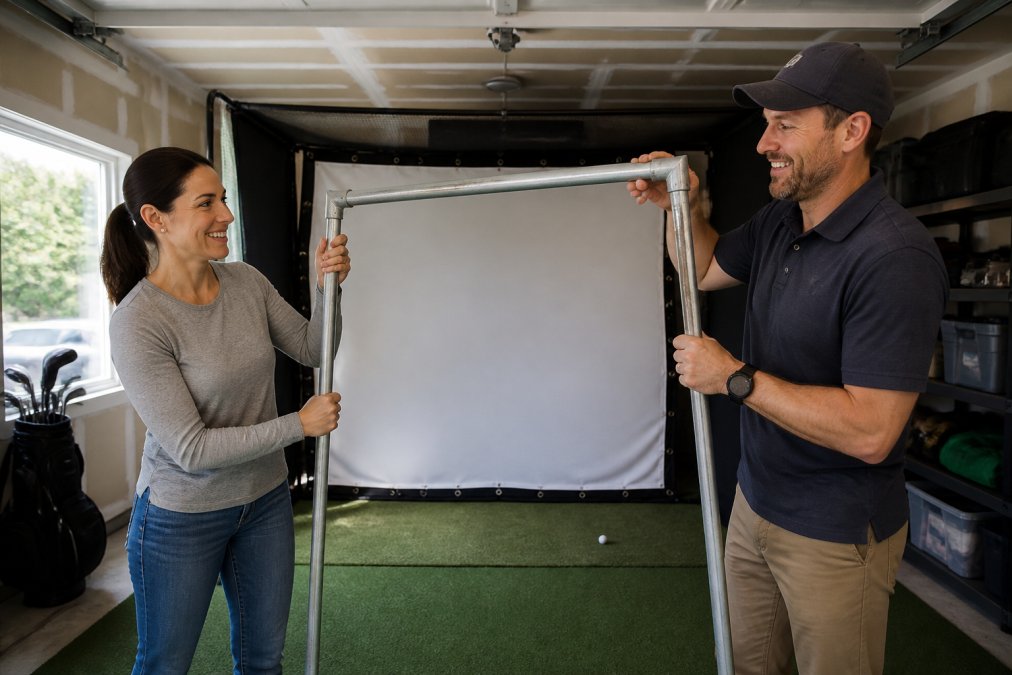
EMT Conduit vs. Aluminum Frames
EMT conduit is the budget standard: steel tubing cut to length, joined with fittings, inexpensive to replace. Aluminum costs more but resists corrosion and holds tighter tolerances, worth it for a permanent bay. In a humidity-swinging garage, aluminum wins on longevity; in a stable spare bedroom, EMT is hard to beat on value.
Bungee Tensioning and Frame Stability
Bungee tensioning pulls the screen taut against the frame. Properly tensioned, it gives a flat, predictable rebound with minimal bounce-back. Under-tensioned, the screen ripples, distorts the image, and absorbs energy unevenly; over-tensioned, you stress grommets and shorten screen life.
The Best Golf Simulator Impact Screen Material for Your Bay
The best golf simulator impact screen material balances three competing goals: absorbing ball speed, displaying a clean projected image, and holding up under repeated strikes. That tension makes screen choice the most consequential decision in the build.
Weave, Weight, and Bounce-Back
Weave determines image sharpness: a tighter, finer weave gives a smoother picture but can reduce energy dissipation. Weight matters too, heavier screens absorb more impact and sag less, while lighter screens tension easily but wear faster at the strike zone.
DIY Golf Simulator Enclosure vs Kit: Which Fits Your Build?
DIY golf simulator enclosure vs kit comes down to time, tools, and tolerance for trial and error. A DIY build can cost less in materials but demands design work, sourcing, and problem-solving nobody warned you about. A kit trades some savings for a tested design, correct hardware, and a known result.
Here's how the trade-offs break down:
Factor | DIY Build | Pre-Made Kit |
|---|---|---|
Upfront cost | Lower materials cost | Higher, but predictable |
Design time | Significant | Minimal |
Frame sourcing | You spec and cut | Included and sized |
Screen fit | Risk of mismatch | Engineered to frame |
Troubleshooting | On you | Support available |
Best for | Confident builders | Most buyers |
What a DIY Build Actually Requires
A DIY enclosure is not a weekend project for most people. The parts list: EMT conduit or aluminum extrusion cut to length, corner fittings, a tensioning system (bungee, shock cord, or sleeve-and-rod), an impact screen sized to the frame opening, side netting, floor padding, and fasteners matched to your surfaces. Tools: pipe cutter or chop saw, deburring tool, tape measure, level, and a drill with bits for concrete, drywall, or wood studs.
Where Kits Earn Their Price
A kit's value isn't the tubing, it's the engineering already done. The frame is sized to the screen, the screen to the frame, the tensioning hardware rated for the screen's weight, and the fasteners specified for common surfaces. That removes the three most common DIY failure points at once.
The Hybrid Path Most Buyers Miss
You don't have to choose one or the other. A common pattern: buy a kit for the frame and screen, where fit matters most, and source side netting, floor padding, and blackout curtains separately. Netting forgives small dimension differences, and blackout curtains come in standard sizes. This hybrid captures most of the kit's fit advantage while controlling cost on less fit-critical components.
Match the Enclosure to Your Launch Monitor
Enclosure geometry and launch monitor technology are linked, and most buying guides ignore it. Radar monitors track ball flight over distance, so they need depth behind the ball and a clear path to the screen. Camera monitors capture the club and ball at the strike point, tolerating tighter spaces but demanding consistent lighting.
Safety, Electrical, and Long-Term Maintenance
Safety and maintenance are where cheap kits reveal themselves. A safe bay has a defined safety perimeter, floor protection under the hitting mat, and side netting extending past the frame's edges. Balls ricochet off frames, shank sideways, and find gaps, side netting and a properly anchored frame close them.
Fire Safety and Fabric Selection
Enclosed hitting bays concentrate heat and electricity in a small footprint, and most guides never mention it. When comparing screens and side panels, ask whether the fabric carries a fire-retardant treatment or meets a recognized flammability standard. Many impact screens and blackout curtains are treated; some budget imports are not. If the spec sheet doesn't say, ask.
Electrical Planning and Cable Management
Plan your projector mount, cable management, and outlet placement before the frame goes up, running power afterward means working around a tensioned screen. Route cables along the frame, not across the hitting area, and confirm your projector's throw distance matches your bay depth.
A few practical rules that prevent most problems:
- Use a surge protector or a power conditioner for the projector and launch monitor. Garage and basement circuits are prone to voltage dips when other equipment cycles on.
- Route low-voltage signal cables (HDMI, USB, ethernet) away from AC power lines where possible to reduce interference.
- Secure every cable with clips or conduit along the frame. A loose cable in the hitting area is both a trip hazard and a target for a shanked ball.
- Confirm the circuit can handle the combined load of projector, launch monitor, computer, and lighting. If you're unsure, have a licensed electrician review the circuit before you add equipment.
- Follow the manufacturer's instructions for any hardwired equipment. Local electrical codes govern permanent wiring, and a qualified electrician is the right person to make that call.
Screen Longevity: Cleaning, Rotation, and Repair
Most guides stop at buying the screen. Extending its life is where the real savings are.
Common Mistakes in Enclosure Kit Buying
The same mistakes show up over and over, and every one is avoidable with a tape measure and a few questions.
- Buying before measuring ceiling height. A 9-foot ceiling limits full driver swings, and no kit fixes that.
- Ignoring the launch monitor's space needs. Radar and camera units have different depth and lighting requirements.
- Choosing a screen on price alone. Thin screens bounce back and wear through at the strike zone.
- Skipping side netting. Balls leave the bay sideways more often than buyers expect.
- Under-buying the frame. A flexing frame distorts the image and loosens the screen.
- No plan for cable management or projector mounting. Retrofitting power around a finished bay is miserable.
- Assuming a bundle is complete. Check that installation hardware matches your walls and floor.
Conclusion
The hardest part of buying an enclosure kit isn't the shopping, it's the measuring and matching, exactly where a knowledgeable partner earns their keep. My Golf Simulator offers consultative guidance on space requirements, honest advice on radar versus camera tracking, and post-installation support so you're never troubleshooting alone. Get started with www.mygolfsimulator.shop and book a consult to build a bay that fits your room, your monitor, and your game.
Frequently Asked Questions
Is 12x12 big enough for a golf simulator?
A 12-foot-wide, 12-foot-deep bay works for most drivers, but only if ceiling height clears your swing. Width should give at least 3 feet of clearance on each side of the hitting zone, and depth needs to cover launch monitor throw distance plus follow-through. Check your longest club against the ceiling before committing. If your ceiling is under 9 feet, a shorter enclosure and a camera-based launch monitor may fit better than a full-size bay.
What material is best for a golf simulator enclosure?
Woven polyester impact screens hold up better than thin vinyl or canvas because the weave absorbs ball speed instead of rebounding it. Look for a screen with a tight, uniform weave and reinforced grommets, since screen tension and fabric durability drive both image quality and bounce-back control. Pair the screen with side netting rated for your swing speed, and add blackout curtains if ambient light washes out the projector image.
What are the benefits of a pre-made enclosure kit vs. DIY?
A kit ships with matched frame, screen, netting, and installation hardware, so the geometry is already tested and you avoid mismatched parts. A DIY build can cost less in materials but takes more time and often needs extra trips for fittings. Kits also make modular expansion easier later. If you want a proven setup footprint with fewer surprises, a kit usually wins; if you enjoy fabrication and have a specific custom size, DIY can work.
How do I measure my room for a golf simulator enclosure?
Measure width, depth, and ceiling height at the hitting zone, not at the room's widest point. Account for projector mount position, cable management, and a safety perimeter behind the screen. Add at least 1 foot of clearance above your highest swing point and 3 feet on each side of the ball. Write down the smallest of each measurement, since that number decides what enclosure kit will actually fit.